ANRISK® Platform User Manual
(Client & Manager)
제품 설명
ANRISK®는 일반 건강검진 결과만으로 뇌동맥류 발생 위험도를 평가하는 인공지능 (AI) 알고리즘 기반 플랫폼입니다. 고성능 인공지능(AI)을 통해 누구나 합리적인 비용으로 안전하게 뇌동맥류 위험도를 측정하고 확인할 수 있습니다. 이 분석은 건강검진 데이터를 기반으로 진행되며, 산출된 위험도 점수에 따라 총 5단계로 분류하여 결과를 제공합니다.
사용 목적
뇌혈관 질환의 기왕력이 없는 건강한 일반인을 대상으로 뇌동맥류 발병 위험도 점수와 개인화된 목표 건강 수치를 제공하여 향후 위험 지수를 낮출 수 있는 제안을 제시하는데 사용됩니다.
적응증
본 제품은 뇌혈관 질환의 기왕력이 없는 건강한 일반인에게 뇌동맥류 발병 위험에 대한 건강 관리 목적으로 사용됩니다.
1. Sign up
Request an Account
Signing up directly through the website is not currently supported. Please contact our customer service via email([email protected]) to request an account.
2. Dashboard (Home)
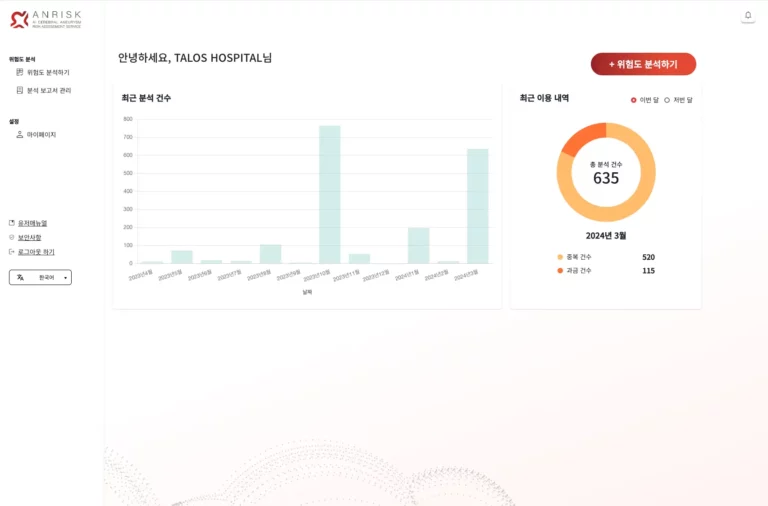
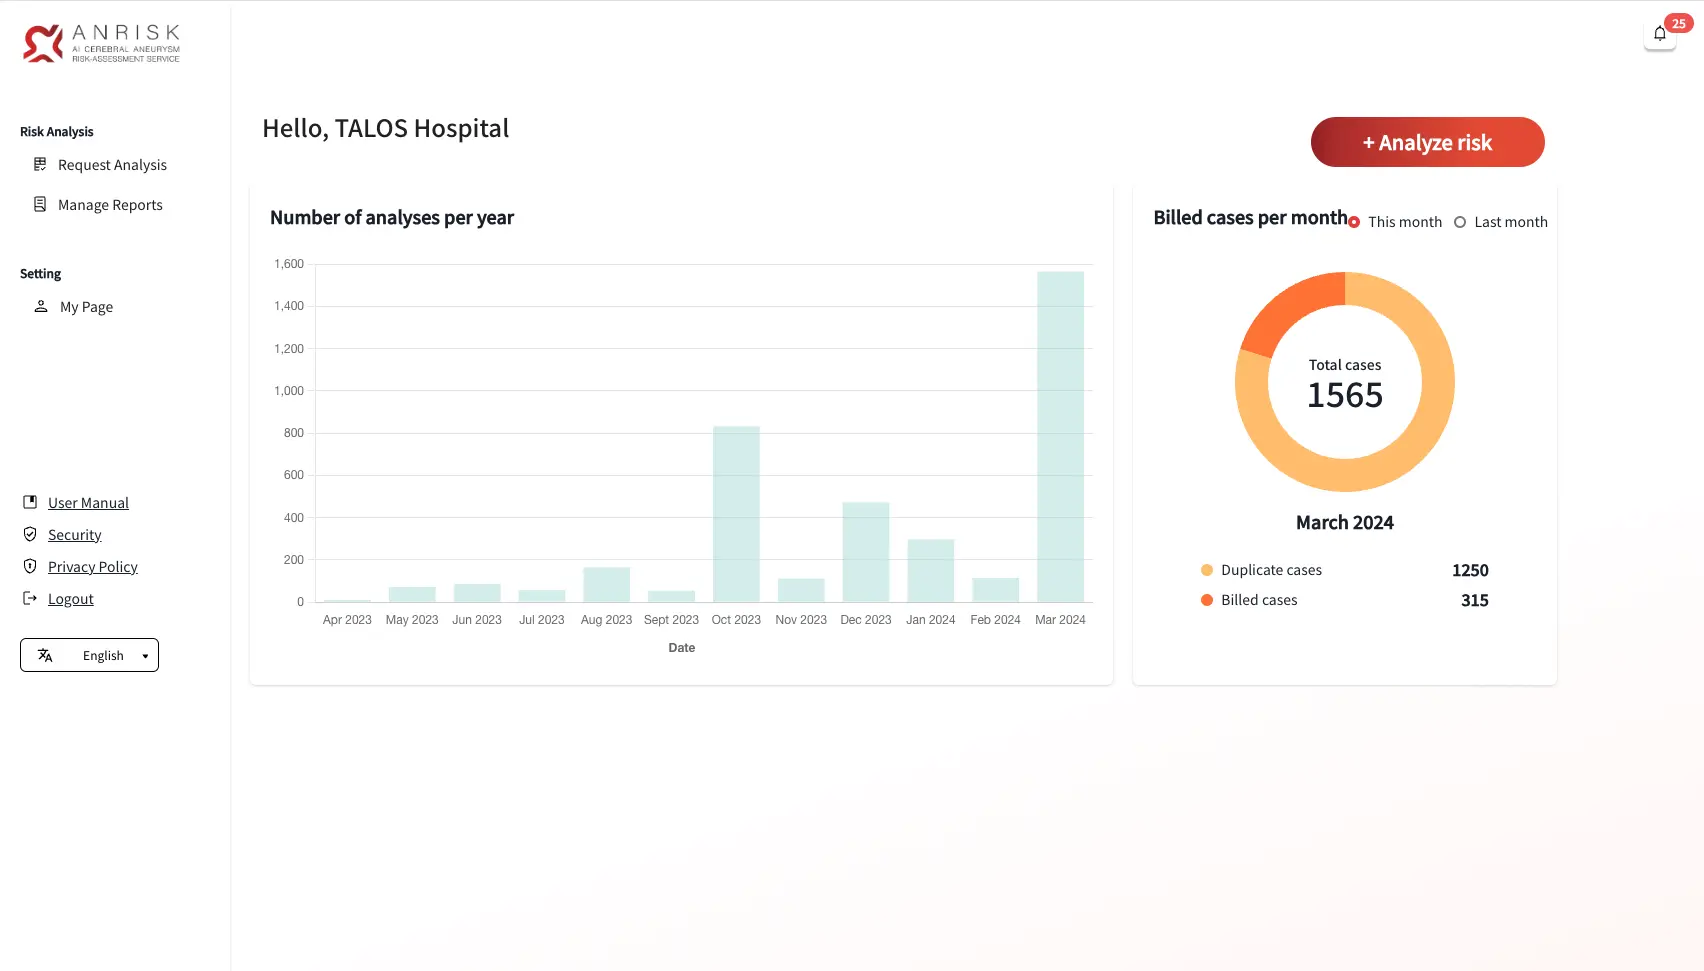
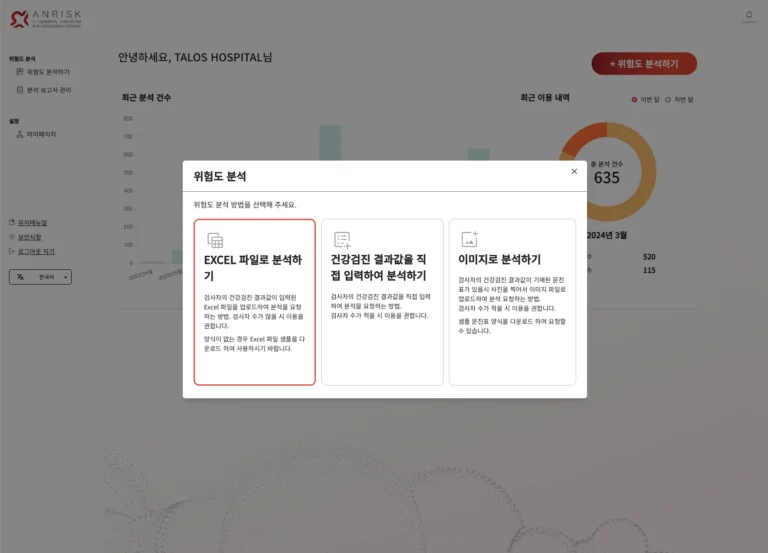
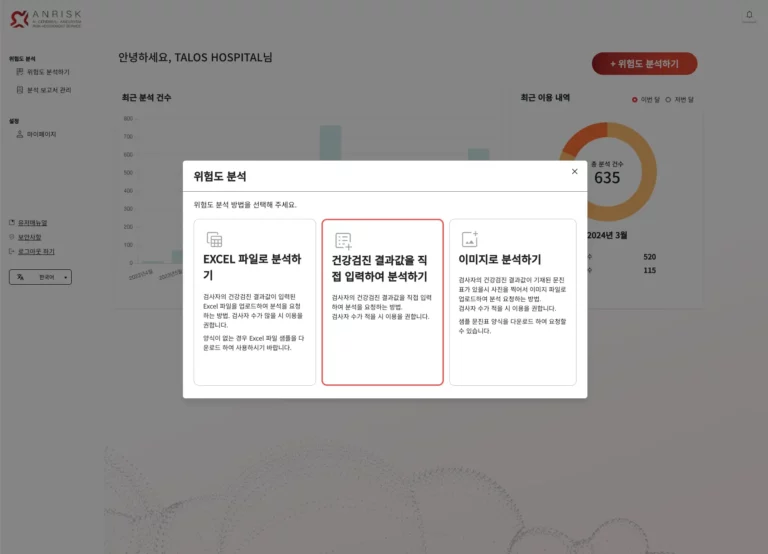
3. Risk Analysis
There are three ways to request a brain aneurysm risk analysis. Once your request is submitted and the analysis is complete, a downloadable report is generated. Please note that the data will be deleted 7 days after generation. Therefore, ensure that you download and save the report beforehand.
Analyze Using Excel File
- Click on the file selection area to choose the Excel file from your computer, or drag and drop your file to upload for analysis.
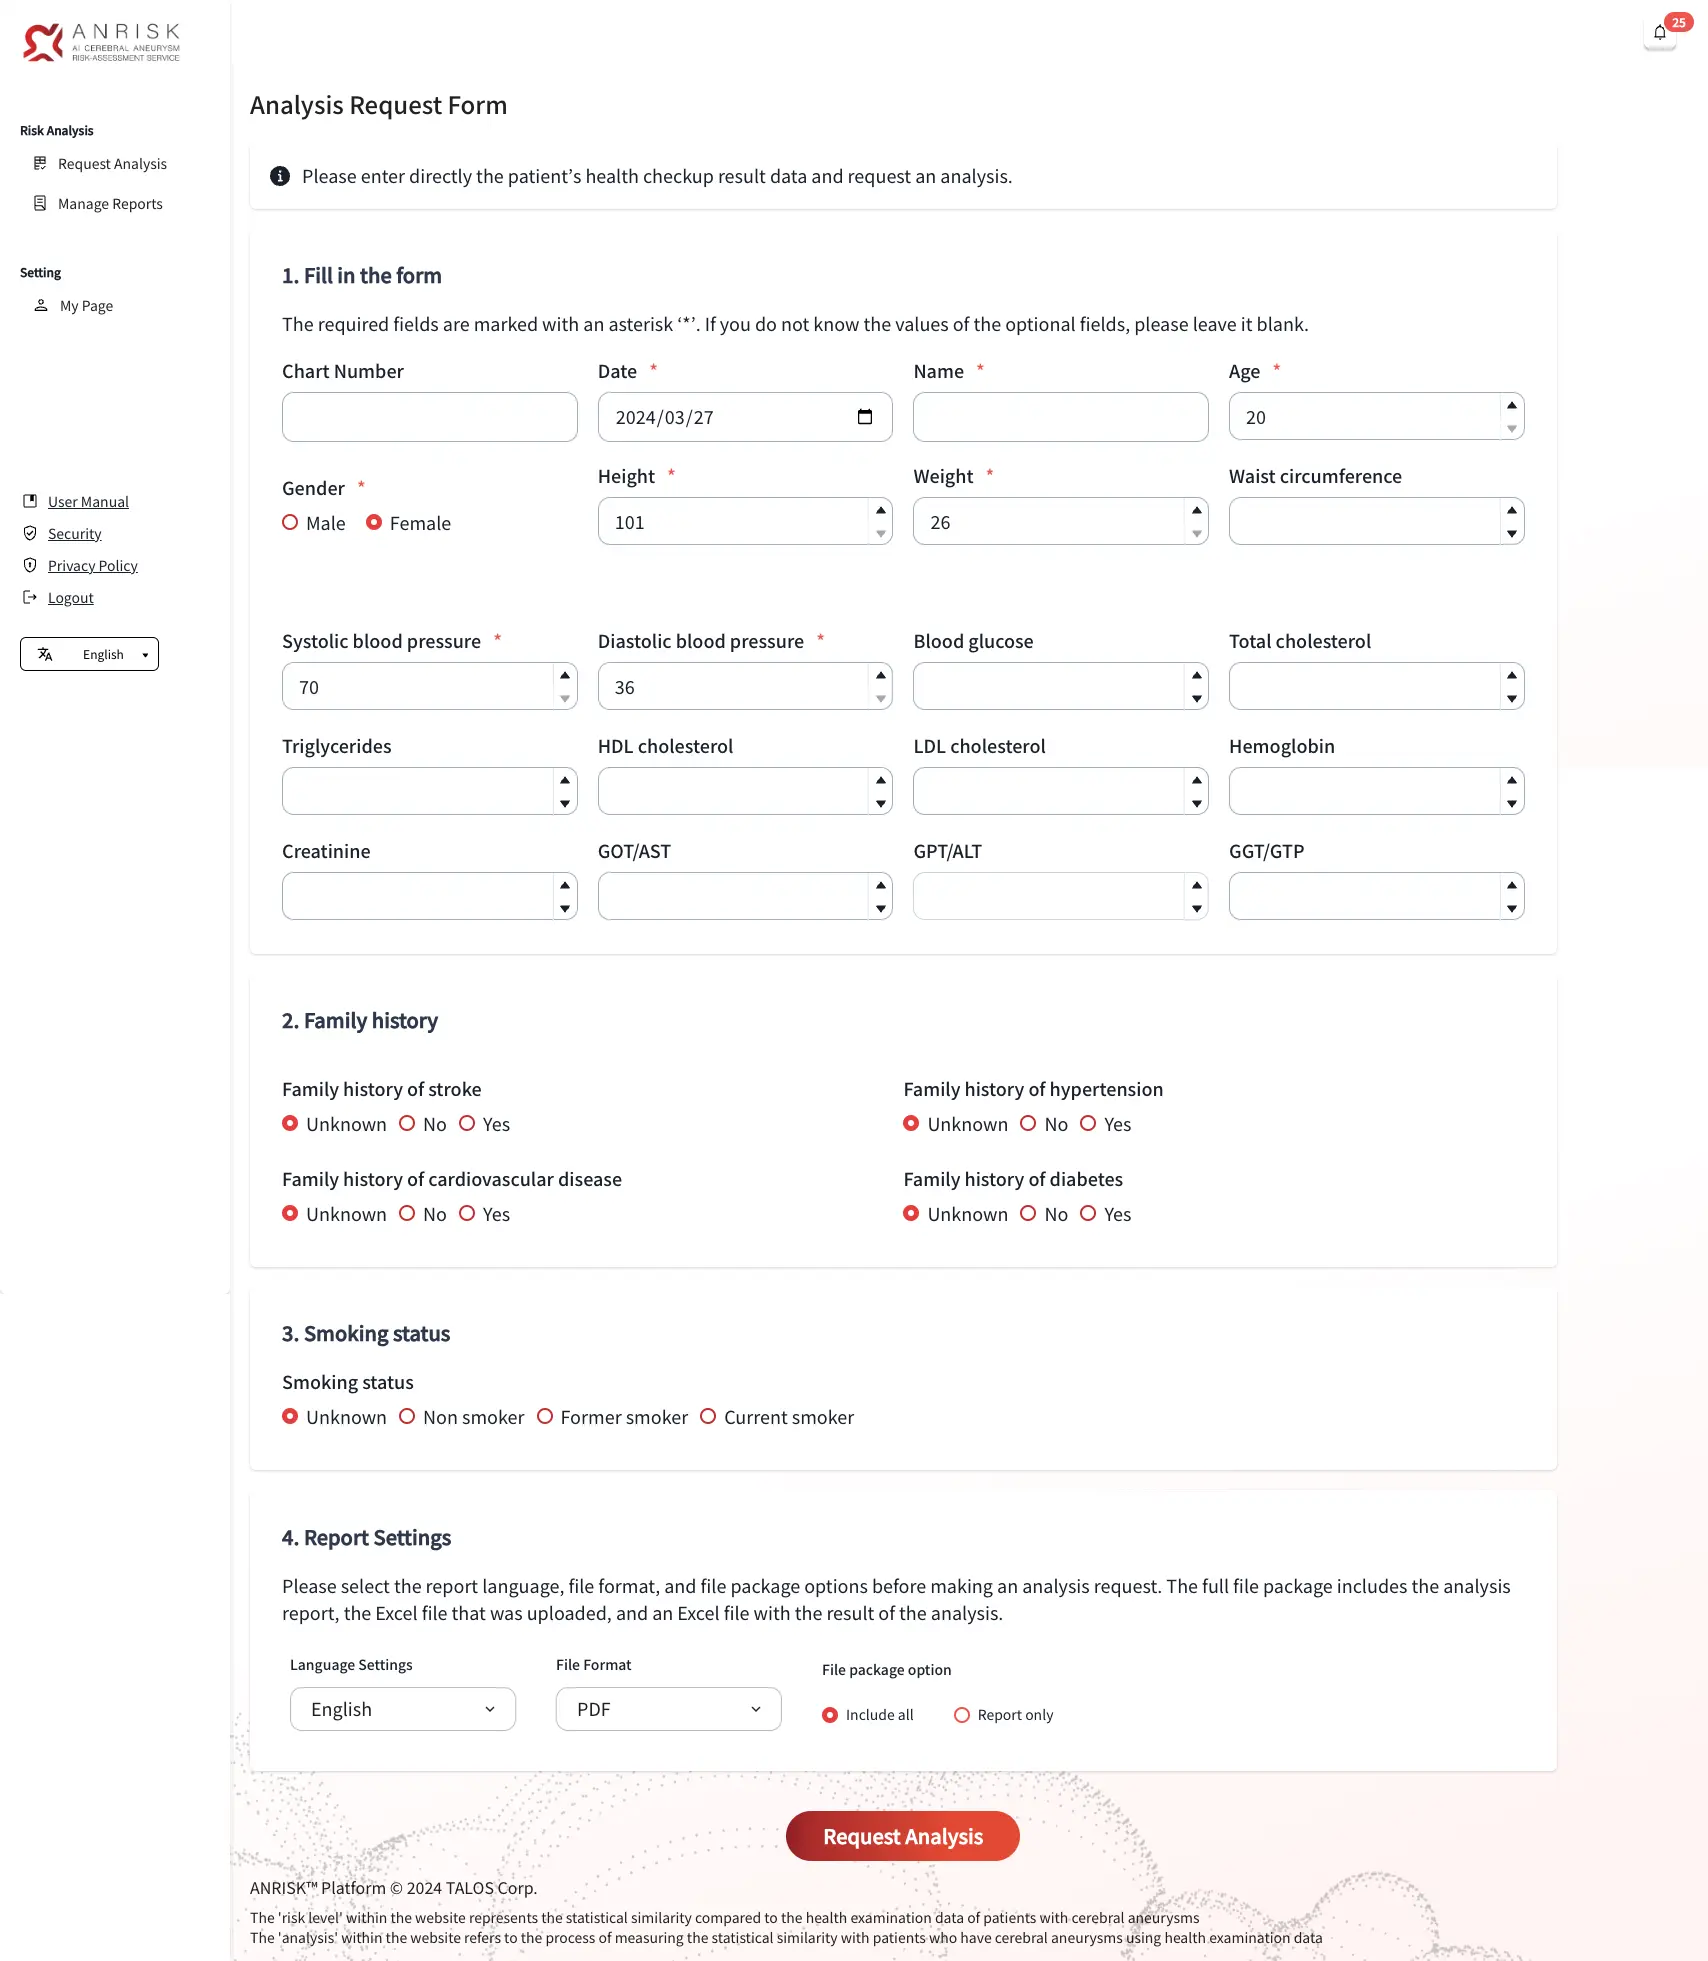
- In the report settings, the language of the report, as well as the file type, and package can be selected. The "Include all" option includes the analysis report, the Excel file that was uploaded, and an Excel file with the results of the analysis.
- After uploading your file and setting your preferences, click the “Request Analysis” button below to submit your request.
- Once the analysis is complete, the report will be available on the "Manage reports" page from the menu.
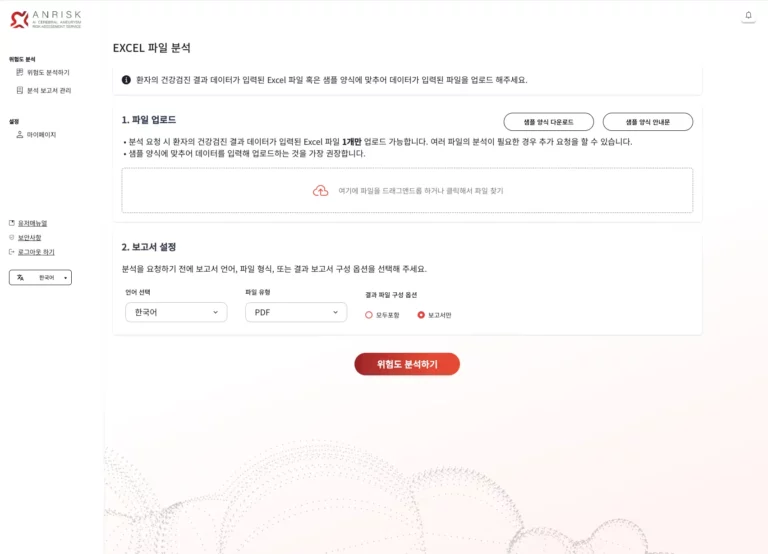
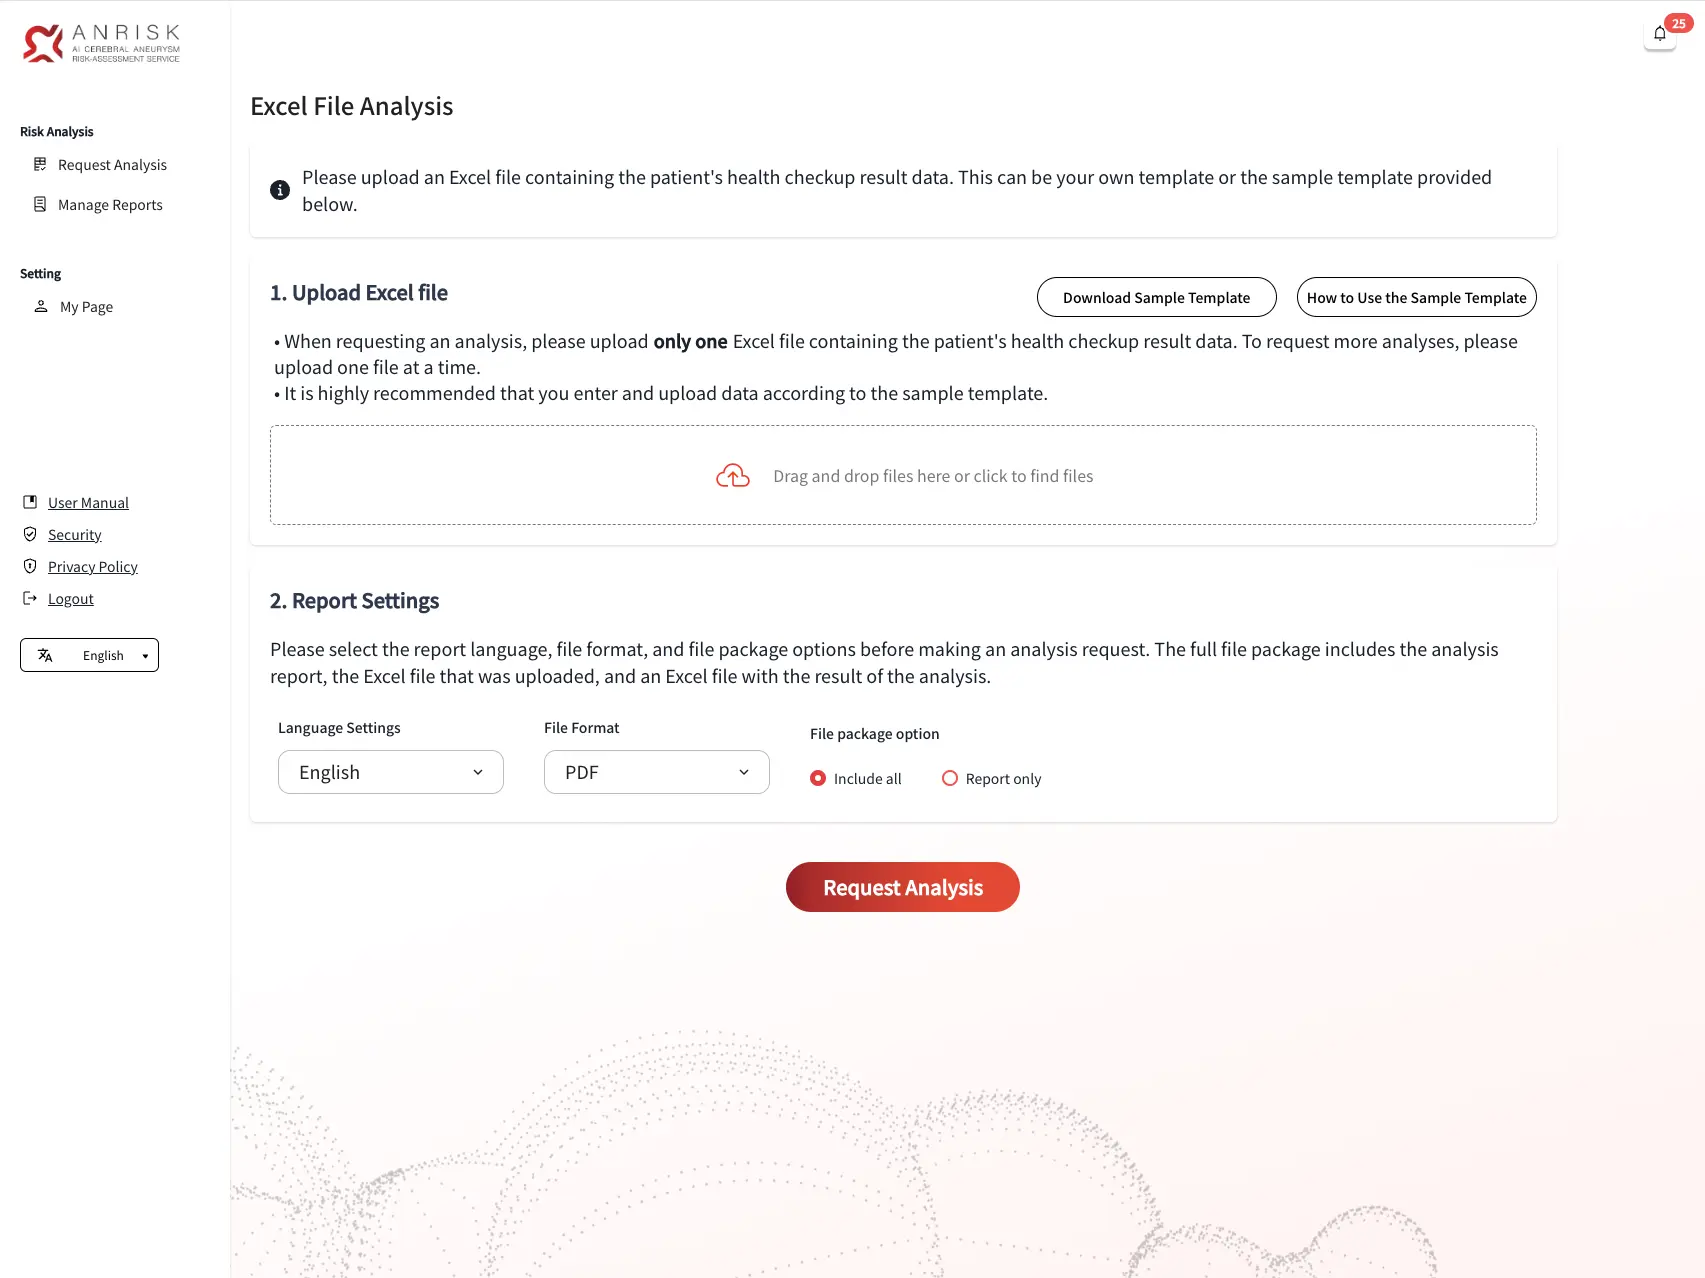
- Before uploading your file, please make sure that all required fields are filled in.
- You may use the template provided by the platform, or upload a file to use as your template. Click "Download Sample Template" to download the Excel template file provided by the platform.
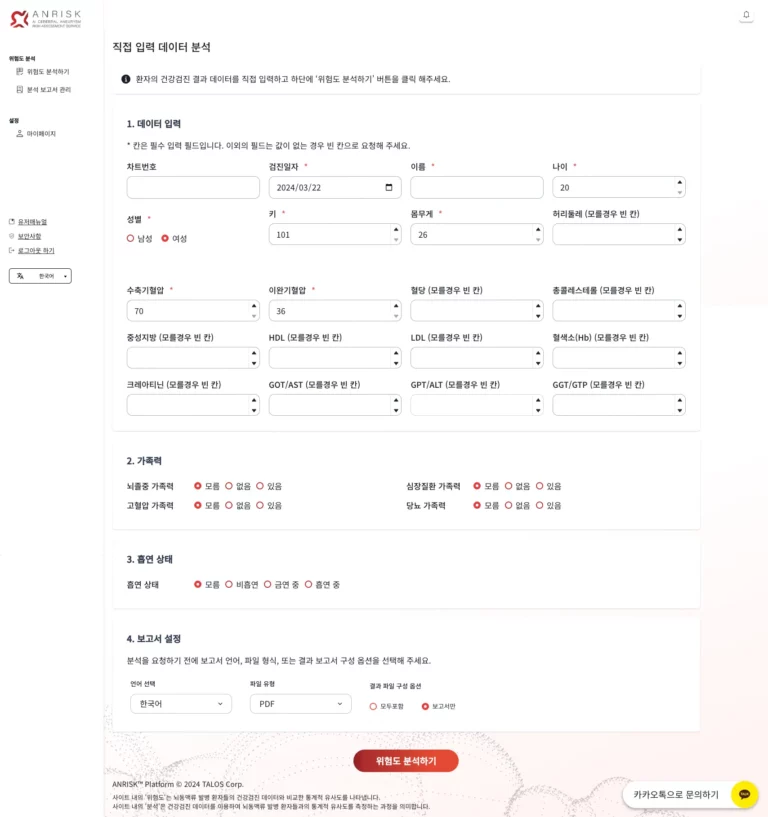
Manual Entry of Health Screening Data
- This method allows you to enter health screening data directly into a form. Required fields are marked with an asterisk (*).
- Optional fields can be left blank if unknown.
- This method is best suited for small amounts of data requiring immediate analysis.
- After entering the data, select your report settings and click the “Request Analysis” button to complete your request.
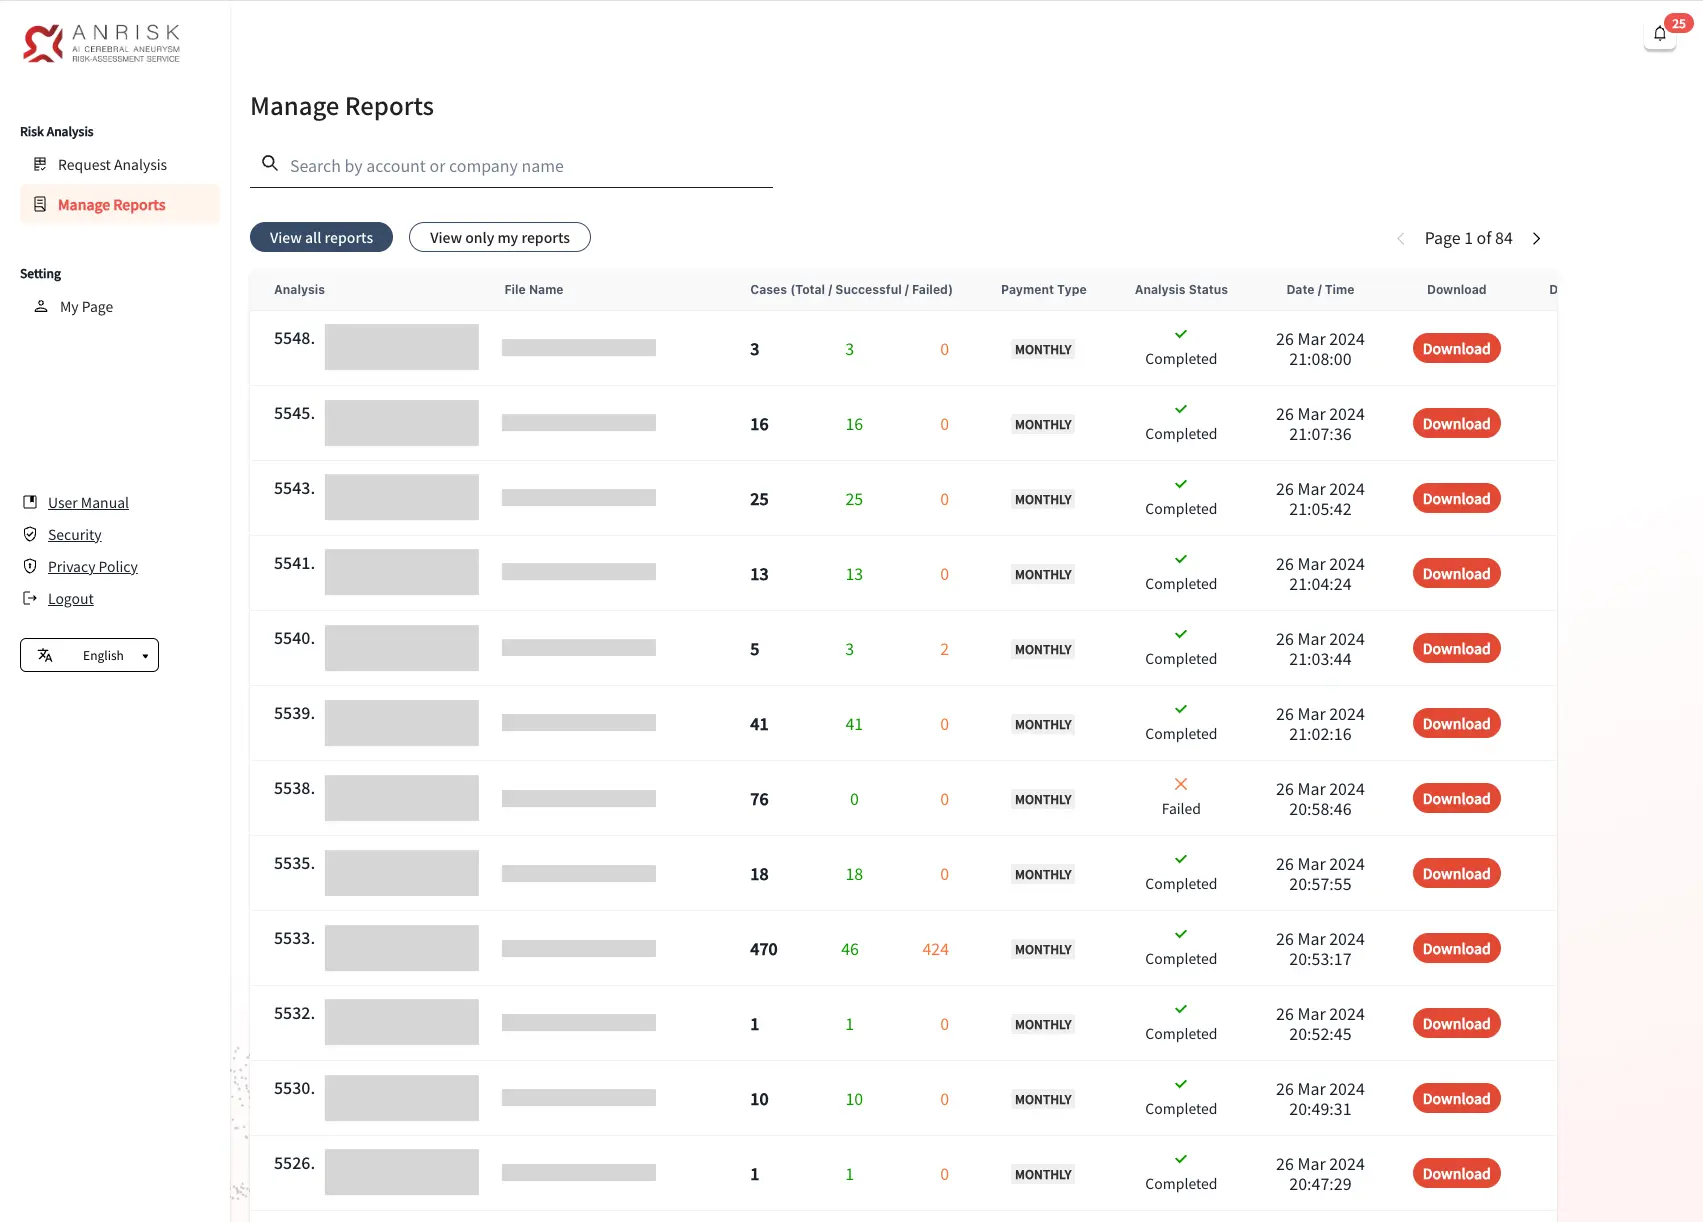
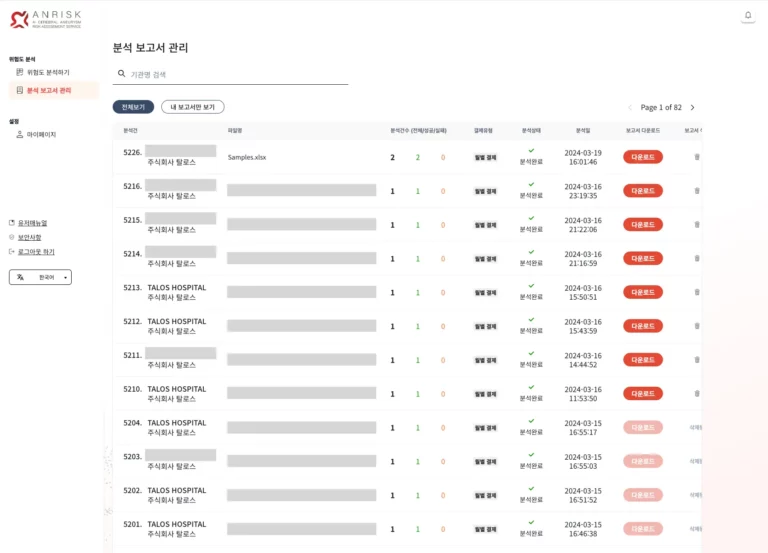
4. Manage Reports
- This page shows the history of all submitted analysis requests. You’ll see information such as the analysis ID, manager name and affiliation, file name, number of cases (including total/success/failure), and a download button.
- If the uploaded file contains unusable data, the analysis will be marked as failed and no report will be generated.
- Reports are set to expire 7 days after analysis, and the download button will become inactive. Please note that the reports cannot be recovered once expired.
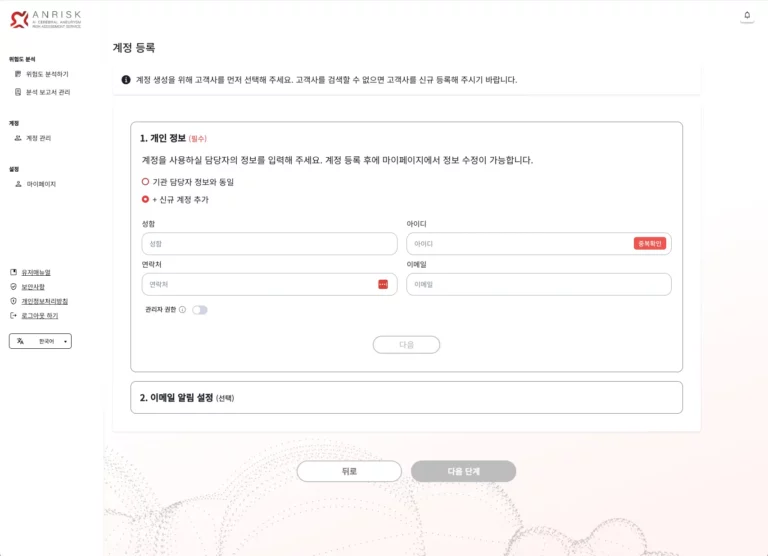
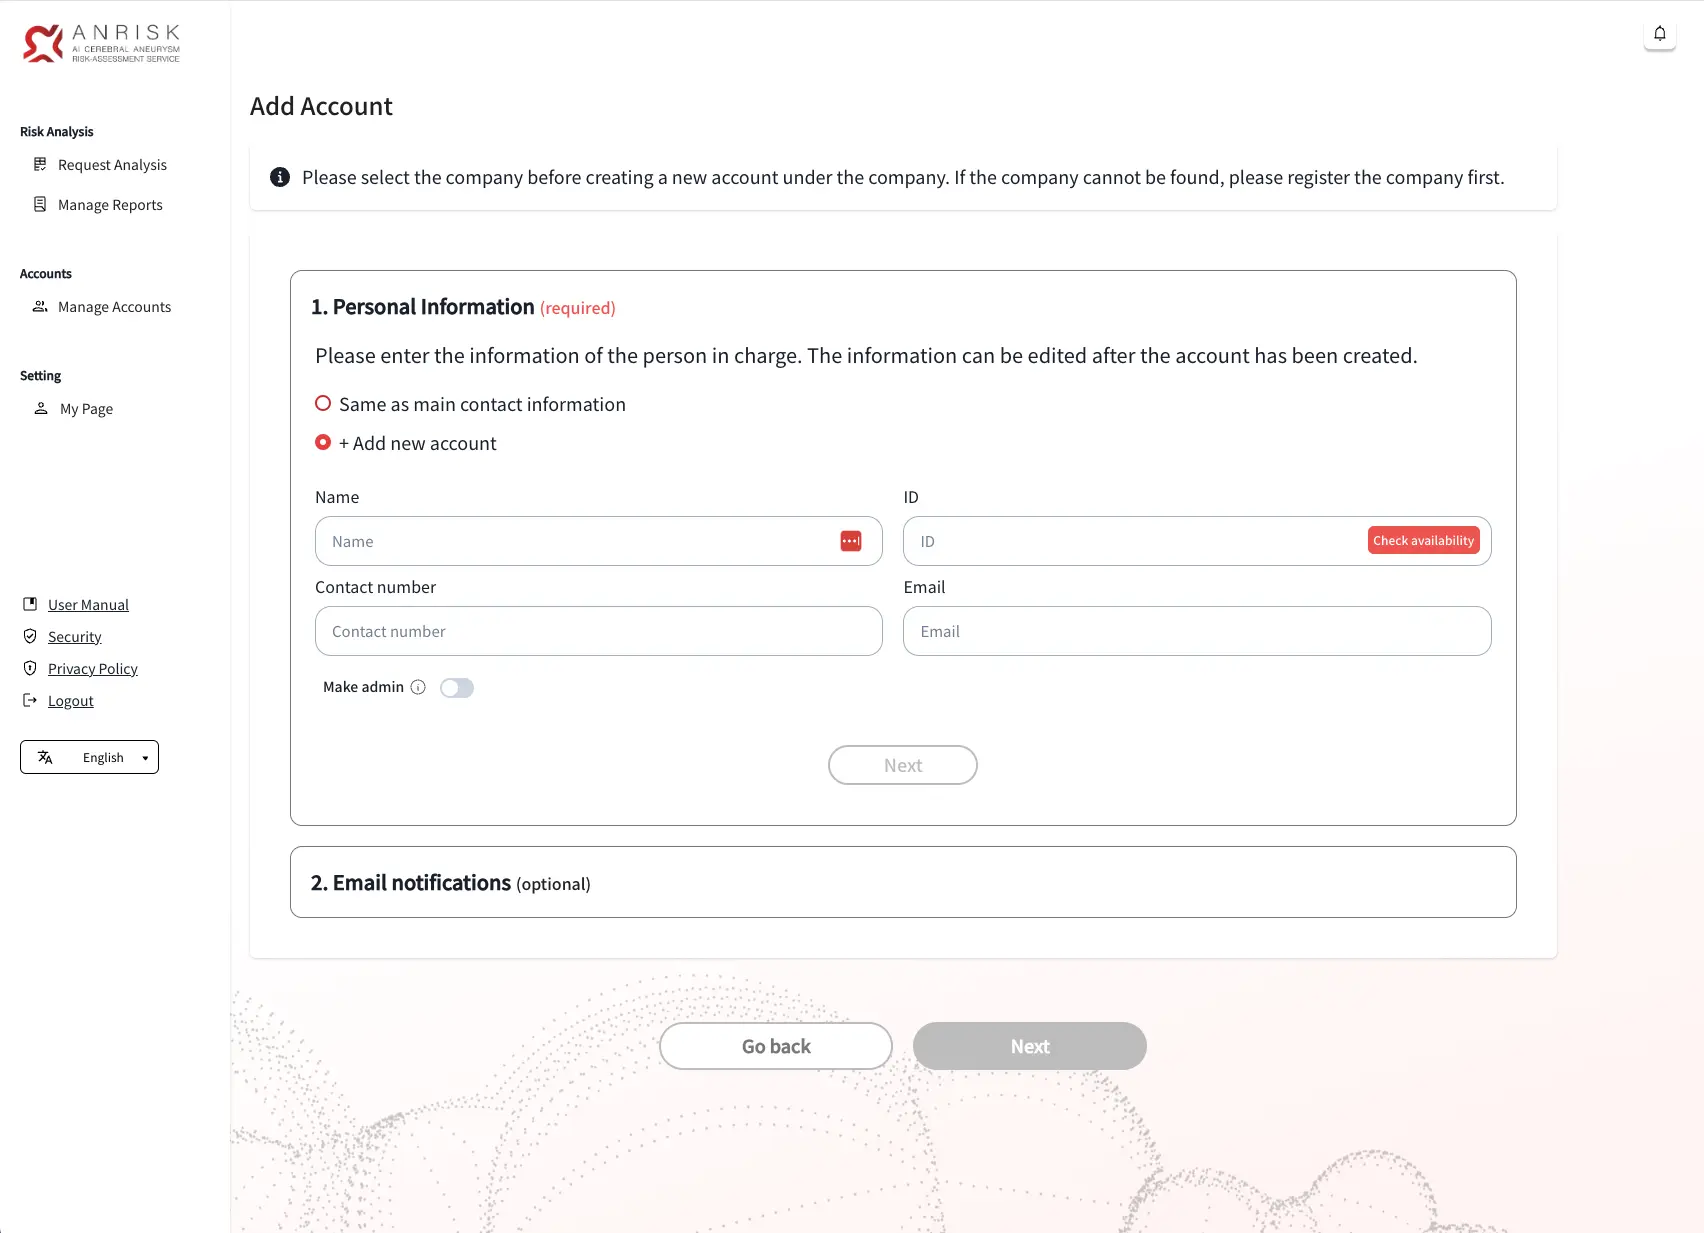
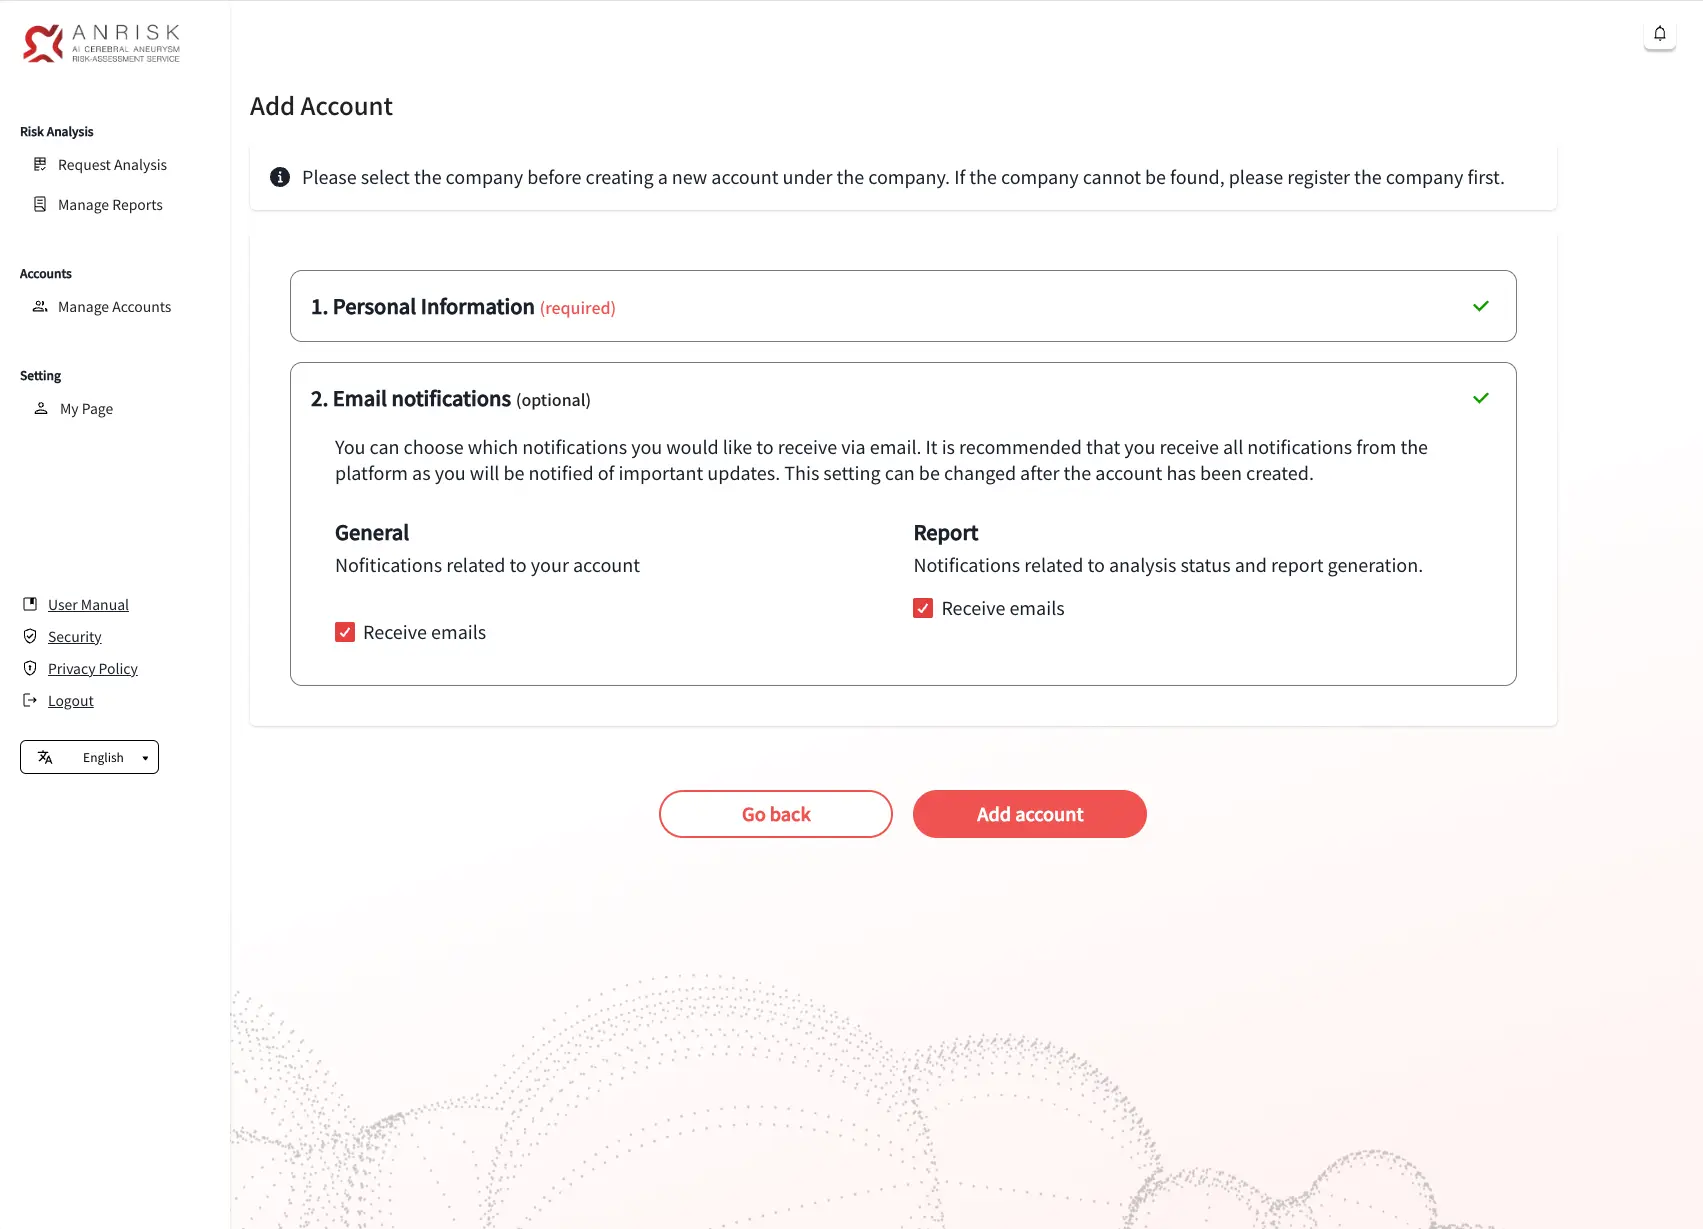
5. Manage Accounts (Manager Access Only)
Accounts with manager access can create additional user accounts. Go to the "Accounts" > "Manage Accounts" page from the menu and click the button at the top right to register new accounts.
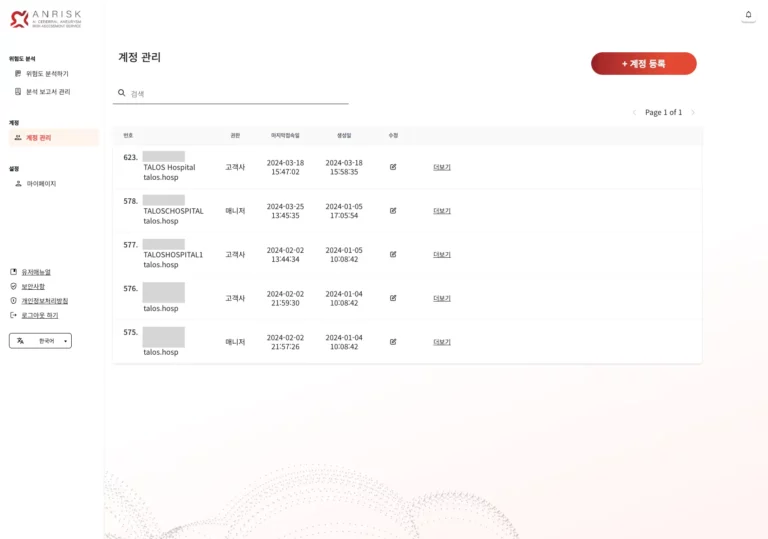
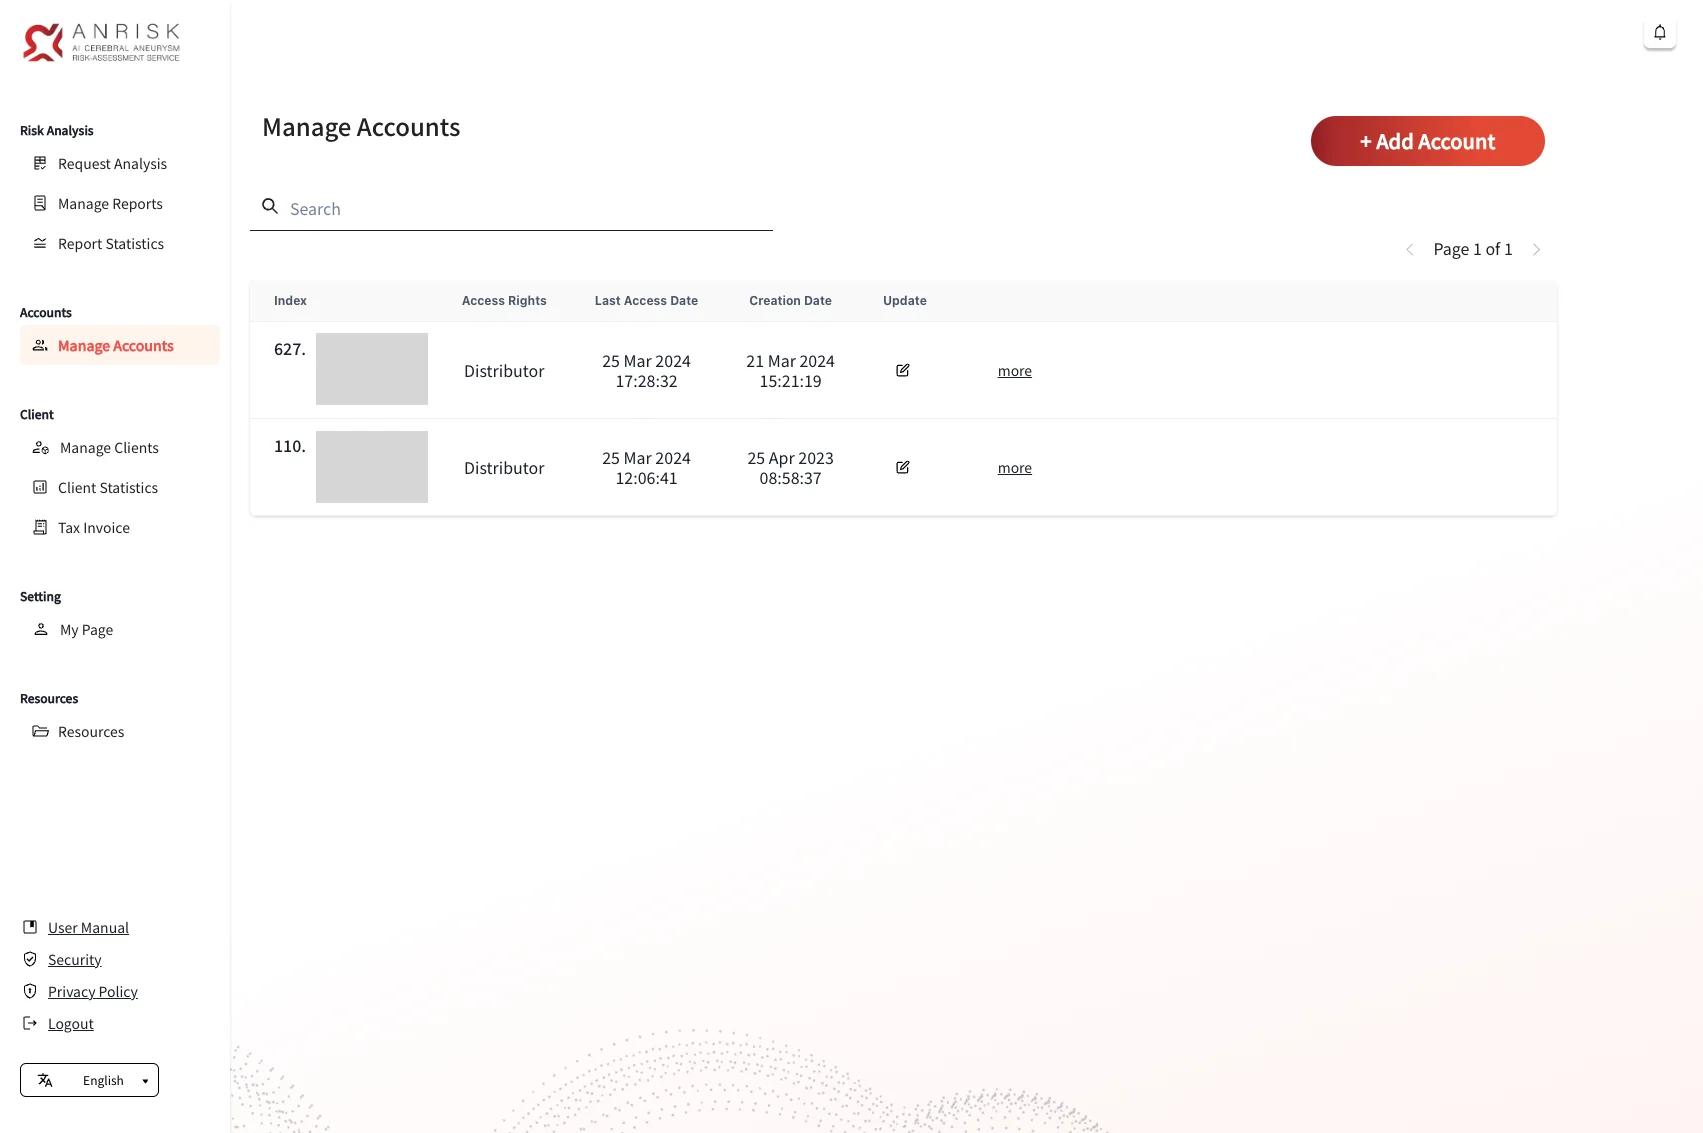
Register a New Account
- To create an account, first select the associated client company. If the company does not appear in search results, please register the company before creating the user account.
- Click the “+Add Account” button to complete the registration.
- A password reset email will be sent to the registered email address. Please note that the password must be reset before logging in to the platform for the first time.